Showing posts with label patterns. Show all posts

February 22, 2020

Latest Project - Daisy in the Corner Granny Square

When you fall in love with a pattern you see shared on Facebook, you have to go buy the yarn to start it right away, no matter how many other projects you having going on, right?  That's a rule, right?  RIGHT?

The Daisy in the Corner pattern came across my feed and I was immediately hooked.  It's an easy pattern to follow, with a little bit of a spin on the traditional granny square.

I loved the way the designer made it with the two shades of two different colors, and wanted to somewhat replicate that, without being exactly those colors.  I had a tough time finding shades that would work, but finally settled on purples and oranges.  Not a combination I would ever have thought about previously, but I think it works ok. 


After looking at just these four squares, I think I might try joining them with all four daisies pointing towards the middle, instead of the same way at lower left.  I think that'll give it a completely different look, but will have to do the math and see if four blocks made into a larger block will work out for an appropriate length and width.  Look for that post soon.

I think this pattern is also a great way to use up scraps of yarn from your stash.  You could keep the center and daisy the same throughout, add bits of whatever colors you have for the portion around the daisy, then use a common color for the join.  It would end up being a very colorful, somewhat scrappy-with-a-pulled-together-look sorta afghan.  I think I'm going to save my scraps to do just that.

What's on your hook today?

~ Marie Anne


April 26, 2019

Crochet Withdrawal, and Wanting to Try Something New

I haven't picked up a crochet hook in a month or more, and I think I'm going into withdrawal.  I had been crocheting dishcloths while watching TV and walking in place to get my steps in, but switched to reading books while walking figure 8s in the hotel room.  Hey, whatever works, right?  But while I love to read, it's not giving me any tangible results for my efforts, ya know?  I think I need to find balance.

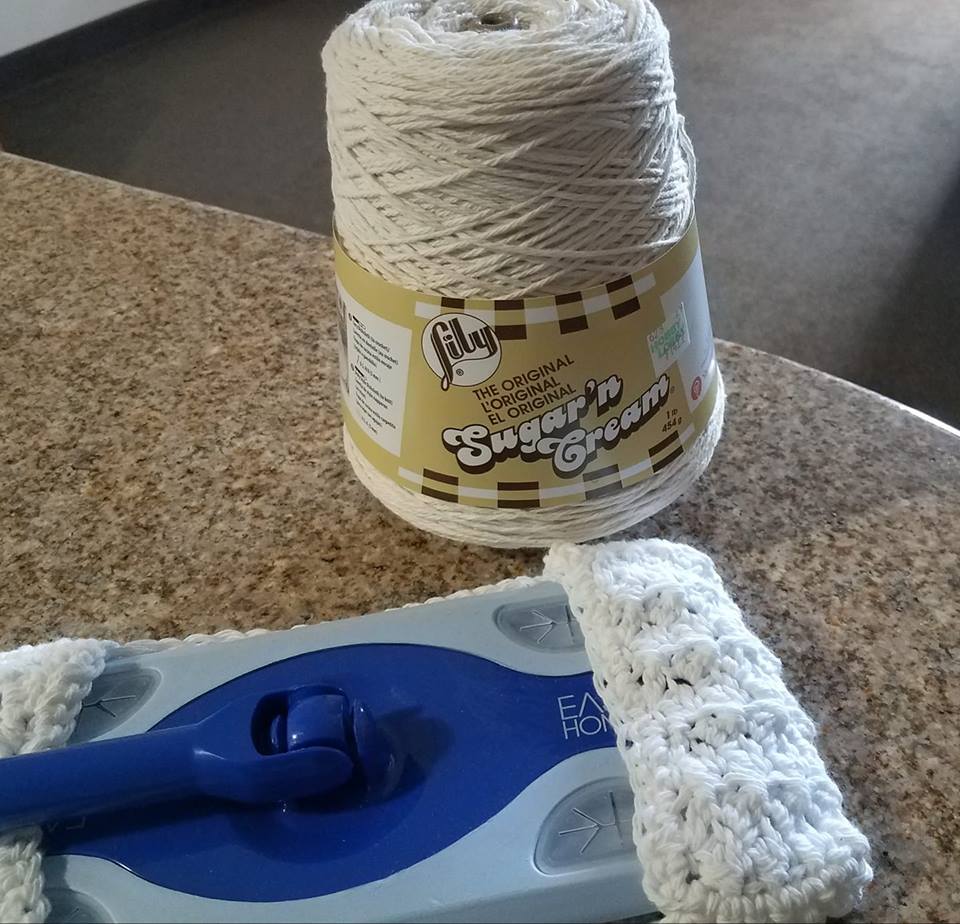
I bought a cone of ecru cotton yarn a few weeks ago, intending to make some Swiffer-type cloths, but there it sits, with the paper wrapper still intact.  I do need to get that pattern written and published as it's not doing anyone any good filed away in my head.  Someone give me a push!

What prompted me to write this blog post, though, was a pattern for this pretty Gardenia Shawl I saw on Facebook this morning.  I haven't worked with thread in a bit because that requires sitting down and concentrating a little more than dishcloths (that I could likely do blindfolded) and I can't do that while walking in a hotel room.  I'm stuck sitting here so much that I need to find things that will allow me to keep moving in my limited living area (yes, I'm still displaced from Hurricane Florence, 7 1/2 months later).

Anyway, the pattern I saw this morning really caught my eye and I wondered if my fingers could manage to turn out something so pretty.  Looking further at the instructions and materials needed, I saw that it required Aunt Lydia's size 3 thread (usually used for apparel) which I'd never worked with before.  It also calls for a larger crochet hook (4mm/G) than one would normally use for thinner thread, as with doilies.

So now I'm tempted to see if any local stores carry the size thread needed to make this shawl, and give it a try.  What's the worst that can happen?  I spend a couple of bucks on a ball of thread that I won't use ... not a big deal.  I really do want to give this a good effort as I love the look of this shawl, and it would be perfect for church when I never know how warm or cool it will be in the sanctuary on any given day.  A lacy shawl would give just a bit of coverage if the air conditioning is a bit too much, but also flimsy enough to shrug off and set aside without taking up any room. And in the current spring season, sometimes it's still a bit chilly when I head out to church, but hot as blazes when coming out.  A lightweight shawl would take care of a couple of 'what to wear' dilemmas nicely.

Have you ever crocheted with size 3/apparel thread?  What did you make?  I'd love to hear about and see some of your projects!

~ Marie Anne

February 16, 2019

Simple Shell Dishcloth - Free Crochet Pattern

Homemade dishcloths make great gifts, and are quick and easy to make.  A single ball of kitchen cotton yarn will make two dishcloths (depending on pattern), so make several to keep in your gift closet for last minute gift giving.

They’re also nice as face or washcloths for the bath and shower, so pair some of your crocheted cloths with a bar of handmade soap or a fancy body wash for a housewarming or hostess gift that any woman would love. This simple shell pattern would look especially nice in a bathroom with a seashell or ocean/beach themed décor.

If sharing this pattern, please share the link to this blog post. You may print a copy for your personal use, but please don’t print copies to share with others.

Simple Shell Dishcloth Pattern

Abbreviations:

Ch = chain
SC = single crochet
DC = double crochet
HDC =half-double crochet
Sk = skip
St = stitches

With kitchen cotton yarn and size H (5.0mm) crochet hook, ch 30

Row 1:  2 DC in 3rd ch from hook, *sk 2 ch, SC in next ch, sk 2 ch, 5 DC in next ch, repeat from *, ending with sk 2 ch, 3 DC in last ch.  Ch 1, turn.

Row 2:  SC in first st, *sk 2, work 5 DC in next st, sk 2, SC in next st.  Repeat from * across. Ch 3, turn.

Row 3:  Work 2 DC in first st, * sk 2, work SC in next st, sk 2, 5 DC in next st.  Repeat from * across, ending with 3 DC in last stitch.

Repeat rows 2-3 until you have 15 rows, ending with row 3.  Ch 1, turn.

Row 16/finishing row:  Sk first st, *HDC in next two sts, DC in next st, HDC in next two sts, SC in next st; repeat from * across. Finish with SC border around remaining three sides. 

Simple, right?  Enjoy!

~ Marie Anne

P.S.  A copy that's printable without the ads and wonky formatting is paired with another of my favorite cloths in my Etsy Shop, The Crooked Yarn (look for listing titled Two Easy Crochet Dishcloth Patterns).

February 12, 2019

Classically Simple Shell Afghan - Free Crochet Pattern

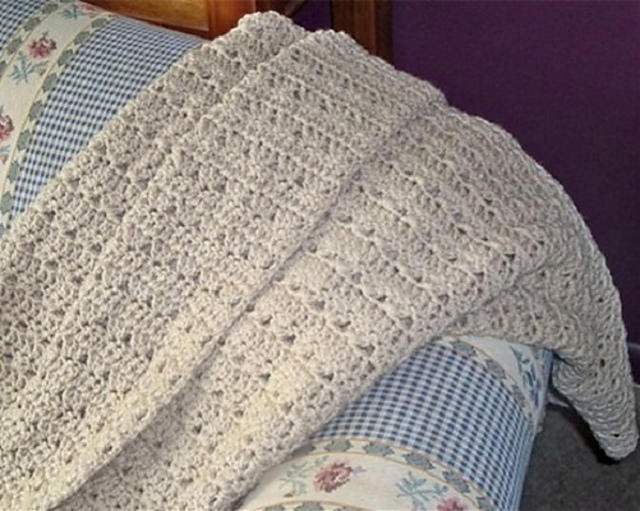
This afghan is made from a very simple shell crochet stitch that can be mastered by a beginner, yet result in a beautiful throw that anyone would be pleased to own.  It's pretty enough to satisfy someone who is more advanced in the art of crochet but wants a simple project to work on that doesn't take a lot of concentration, and easy enough for a novice to complete a beautiful afghan or baby blanket.

While it could be crocheted in a striped manner in your choice of colors, I prefer the look of a single color for this particular afghan pattern.  The blanket works up very quickly and requires only a basic knowledge of the single and either half-double or double crochet stitches and virtually no counting - easy to work on while watching TV without having to worry about losing your place.

Materials needed

Size K crochet hook
Worsted weight yarn in the color of your choice
(5 7-oz skeins should yield an afghan approximately 52" wide x 54" long)

Abbreviations

Ch=chain
SC = single crochet
DC = double crochet
HDC = half-double crochet

The starting chain is a multiple of 3 plus 1.  A chain of 145 should result in an afghan approximately 52" wide.  To make a baby blanket that is 30" wide, start with a chain of 91.  To make larger or smaller, simple add or subtract in increments of 3.

Classically Simple Shell Pattern Directions

With size K crochet hook and worsted weight yarn, ch 145 for afghan, or 91 for baby blanket.

Row 1:  SC in second ch from hook and SC in each remaining stitch across.  Ch 3, turn.

Row 2:  *Skip first two stitches 3 DC in third stitch (all 3 in same stitch), skip two stitches.  Repeat from *, ending with DC in last stitch (turning ch).   Ch 2, turn.

Row 3:  Skip first stitch, HDC across row.  Ch 3, turn.

Repeat rows 2 and 3 for pattern, until afghan measures the desired length.

Last row:  After final row 2 of pattern (shell row), ch 1, turn.  SC in second stitch and remaining stitches across.  Bind off, weave in ends.

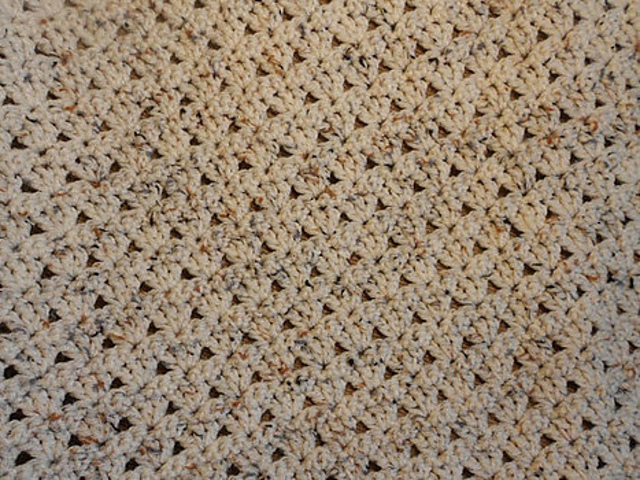
Close up of afghan made from pattern  as
written with the HDC rows between shell rows

Note:  I have also made this afghan with a row of DC between the rows of shells, instead of the HDC rows.  It works up quicker with the DC rows, but I personally think it looks more tidy with the HDC.  You might want to work up a swatch doing it with both the HDC and the DC rows to see which way you like better before starting on a large afghan.  A starting ch of 16 should give you swatches large enough to get a good idea of the how the pattern will look.

Enjoy!

~ Marie Anne

P.S.  Don't forget to check out the rest of my free crochet patterns!


February 11, 2019

Anything But Drab Scarf - Free Crochet Pattern

The olive drab color of this scarf prompted the name of the pattern, but it really is anything but drab. This easy to crochet scarf makes a great set when paired with the matching Anything But Drab Hat.

With the slightly raised texture from working in the back loop only of some of the pattern rows, the finished scarf and hat have almost an Aran or fisherman's knit look to them. I think if you were to work up a set in an Aran or off-white color, it would more closely mimic that effect.

At approximately 4" wide, it doesn't quite fit into the skinny scarf category, but it's not big and bulky either. As written, the pattern will yield a scarf approximately 60" long, but if you'd like a longer scarf to wrap multiple times or to fold in half and feed the ends through, increase the starting chain in increments of 6 to increase the length by 2" for each increment added.  (This scarf is crocheted lengthwise and not by the width, which is the norm).

Anything But Drab Scarf Pattern

Abbreviations:

Ch = chain
Sk = skip
SC = single crochet
DC = double crochet
BLO = back loop only

Foundation: With size I crochet hook and worsted weight yarn, ch 180.

Row 1: In back bump of chain, SC in second ch from hook and SC across (179 SC). Ch 1, turn. (Note: Working in the back bump of chain isn't required, but gives the piece a much cleaner, finished look).

Row 2-4: SC across (179 SC). Ch 1, turn (ch 2 at the end of row 4).

Row 5-9: DC in first st (turning ch becomes the SC), *sk 1, work SC and DC in BLO of next st. Repeat from * across, ending with regular SC in last st. Ch 2, turn (end of row 9, ch 1).

Row 10: SC in first st, SC across in BLO, ending with regular SC in last st. Ch 1, turn.

Row 11-12: SC across (NOT in BLO). Leaving a short tail, cut yarn and pull through last stitch. Weave in ends.

You may print a copy of this pattern for personal use, but if sharing the pattern with friends, please send them the link to the pattern here instead of making printed copies. 

Enjoy!

~ Marie Anne

P.S.  Don't forget to check out the rest of my free crochet patterns!

February 10, 2019

Almost Reversible Baby Blanket - Free Crochet Pattern


You can see that the black is more prominent on
one side, while the reverse looks a little lighter
This puffy shell crochet pattern can be made in two (one light and one dark) or four (two light and two dark) colors.   It’s not completely reversible in that both sides are totally different, but five DCs worked into one stitch makes it a slightly puffy, so the light colors will be more prominent on one side, the dark on the other.

Using four colors won’t be quite as vibrant as the black and white version, but the intensity of the colors will look different on each side as long as you alternate the rows of light and dark colors. It doesn’t matter which color you start with, as long as you repeat the pattern of one row of light, then one row of dark. For a border, work a few rows of single crochet alternating two or more of the colors used in the afghan, or single crochet in one or two colors and then a shell border to give the blanket a finished look.

This pattern can also be made into a full sized afghan, but it can be time consuming to change colors for every row, and then have so many ends to weave in. The shell pattern itself is very easy to crochet, but if changing colors and dealing with those pesky tails is tedious for you, keep that in mind before attempting this pattern to make larger than a baby or lap blanket.

The pattern can be worked in a single color and the shells will still be somewhat puffy, but obviously won’t have the reversible effect.

Materials needed:

Crochet hook size J
Any worsted weight yarn in contrasting light and dark colors
Yarn needle to weave in ends

Abbreviations:

Ch = chain
SC = single crochet
DC = double crochet
HDC = half-double crochet
SK = skip
ST = stitch

Dimensions:

The starting chain should be a multiple of 6 plus 2, and each multiple of 6 (two shells) measures just under 2”. The following dimensions are approximate, and are before adding your choice of border:

30” wide = chain 98
44” wide = chain 146

Almost Reversible Shell Pattern

For a blanket worked in four colors, colors A and C will be the darker colors, and colors B and D will be the lighter colors. If using only two colors, just alternate A and B.

Note: Color A will also be the first row of SC border around the finished blanket.

For a 30” blanket, ch 98 with color A.

Row 1: Sc in 2d ch from hook and in each ch across; leave tail and cut yarn.

Row 2: Attach color B, ch 1, turn. SC in first st, *sk 2, work 5 DC in next st, sk 2, sc in next st. Repeat from * across; leave tail and cut yarn.

Row 3: Attach color C, ch 3 (counts as first DC), turn. Work 2 DC in first st, * sk 2, work SC in next st, sk 2, 5 DC in next st. Repeat from * across, ending with 3 DC in last stitch.

Row 4: Attach color D, repeat row 2.

(You’ll be making a SC at the peak of the shell in the previous row, and the 5 DC shell in the valley between two shells in the previous row).

Repeat pattern rows 2 and 3 until desired length, ending with row 3.

Last row: Attach color A, ch 1, turn. SC in first DC, *HDC in next 2 DC, DC in SC, HDC in next 2 DC, SC in next DC, repeat from * to end. This will make the top of the afghan even, instead of leaving the scalloped shell at the top, and becomes the top border. SC down both sides with color A to complete the first row of border. Add additional rows of SC and/or a shell border to complete.

Enjoy!

~ Marie Anne

P.S.  Make sure to check out more of my free crochet patterns.


February 9, 2019

Circle in the Square - Free Crochet Granny Square Pattern

I like simple crochet patterns, but I also like something that doesn't look too basic.  I think this Circle in the Square granny square pattern fits both of those nicely.  This square is easy enough to make, but I think that starting out as a circle adds an interesting element of design.  It really pops if you crochet it in contrasting light and bright or dark colors.

Materials Needed

Size I crochet hook
Two contrasting colors of worsted weight yarn
Large needle to weave in ends

Abbreviations

Ch = chain
St = stitch
Sl st = slip stitch
Sk = skip
SC = single crochet
DC = double crochet
HDC = half double crochet

Circle in the Square Pattern

Using size I crochet hook and worsted weight yarn will result in a 6" granny square

With Color A, ch 5, join with slip stitch to first ch.

Round 1:  Ch 2 (counts as first HDC at beginning of rounds 1-3), work 17 more HDC in the circle for a total of 18 HDC.  Join with sl st to top of beginning ch 2/HDC.

Round 2:  Ch 2, work 1 HDC in each stitch around, for a total of 18 HDC.  Join with sl st to top of beginning ch 2/HDC.

Round 3:  Ch 2, 1 HDC in same space, work 2 HDC in each stitch around, total of 36 HDC.  Join with sl st to top of first ch 2/HDC.  Finish off.

Round 4:  Join Color B in any stitch.  Ch 3 (counts as first DC at beginning of rounds 4-5), DC in same space, * DC in next st, HDC in next 2 st, SC in next 2 st, HDC in next 2 st, DC in next st, (2 DC, ch 2, 2 DC) in next st (making corner).  Repeat from * to complete other 3 sides, ending with 2 DC in beginning corner, ch 2, sl st to join to beginning ch 2/DC.

Round 5:  Ch 3, DC in same space, * DC in next 10 st, sk last DC, work (2 DC, ch 2, 2 DC) in corner, repeat from * to complete other 3 sides, ending with 2 DC in last corner, ch 2, sl st to top of first ch 3/DC.  Finish off.

Border:  Join Color A in any stitch.  Ch 1, SC around all four sides, working (SC, ch 2, SC) in each corner.  Sl st to join to initial ch.  Finish off, weave in ends.

Enjoy!

Marie Anne

P.S.  Make sure to check out the rest of my free crochet patterns.


February 8, 2019

Gentle Ridges - Free Crochet Dishcloth Pattern


I'm no fancy designer and like to crochet simple things, so I played around with a favorite crochet stitch and threw this little number together pretty quickly.  I think it's the first crochet pattern I wrote down, and that was years ago! Everyone I've shared the pattern with has proclaimed it to be a hit because of its simplicity and functionality, while still being an attractive piece.

I prefer a crochet dishcloth that has a little bit of a raised stitch and even keep a few set aside that I use strictly as washcloths - they're perfect in the bath for gentle exfoliating without being too rough on the skin.  I think this pattern works well in the bath or shower as well as the kitchen.

Gentle Ridges Crochet Dishcloth Pattern

Finished size is approximately 8" x 8"

Materials needed

Size H crochet hook
Any kitchen cotton yarn

Abbreviations

DC = double crochet
SC = single crochet
SK = skip
Ch = chain
St = stitch
Sl St = slip stitch

With size H crochet hook and any kitchen cotton yarn, ch 31

Row 1:  DC in 3rd ch from hook, sk 1, * SC and DC in next ch, sk 1.  Repeat from * to end of row, ending with SC in last stitch.  Ch 2, turn.

(Rows 2-20 are worked in back loop only, except for the first and last stitch)

Row 2-20:  DC in 1st st, sk 1, * working in back loop only, SC and DC in next space, sk 1.  Repeat from * to end of row, ending with SC in last st.  Ch 2, turn.

Finishing:  After completing last st in row 20, SC/ch 1/SC in that corner space, continue to SC around all sides of piece, with SC/ch 1/SC in corners.  Join with sl st to first SC in first corner worked.  Bind off and work in ends.


This pattern can also be adapted to make hot pads/trivets.  Simply make two dishcloths the same size and place one on top of the other and stitch together around outer edges.  You can easily vary the size of the hot pad by increasing the starting chain and/or number of rows.  I also like to make them long and wide enough to fit beneath an oblong or rectangular casserole dish.


For gift-giving, fold, or roll a couple of coordinating dishcloths, tie with raffia, and tuck into a small basket with a bottle of eco-friendly dish soap.  Nestle a pair of washcloths alongside a bar of homemade soap or moisturizing shower gel, then add a scented candle or diffusers and oil for the gift of a truly luxurious bathing experience.  They would be a great gift for a teacher, housewarming, etc.

Enjoy!

 ~ Marie Anne

P.S.  Make sure to check out the rest of my free crochet patterns.

February 7, 2019

Easy Single Double Dishcloth - Free Crochet Pattern

This super simple dishcloth pattern is a favorite of mine. It can be completed by even a beginner and would make a good first project to teach someone who has never held a crochet hook before. I call it the “Single Double Dishcloth” because that’s all there is to it - a single crochet and a double crochet stitch. You should be able to get two dishcloths out of one 2.5 oz ball of any kitchen cotton yarn.

Abbreviations:

Ch = chain
SC = single crochet
DC = double crochet
Sk = skip

Simple single double dishcloth pattern 

With size H (5.0mm) crochet hook, ch 27
(Starting ch 27 of should give you a cloth that measures approximately 8 ½”. If you’d like a cloth that’s larger or smaller, add or subtract in increments or two. Your starting chain should be an odd number.)

Row 1: DC in 3rd ch from hook,* SC next ch, DC, next ch. Repeat from * to end, ch 1, turn.

Row 2: Sk 1st st, DC next st, *SC next st, DC next, st. Repeat from *, ending with DC in turning ch.

Repeat row 2 until piece looks square. On final row, work SC in the last st (turning ch) instead of a DC. (Work the rest of the row the same as previous rows, DC and SC across, except you’ll end with SC in the last 2 sts instead of SC then DC in turning ch).


If desired, work a SC border around all four sides to finish off. In the photos above, the blue is without a border, and the ecru is with SC border.  I usually put a border around all of my crochet dishcloths just because I think it holds the shape better, but it's not required.

That’s it! You’ll be making your SC on top of where a DC was in the previous row, and a DC on top of where the SC was in the previous row, so that the rows won’t be uneven.

Enjoy ...

~ Marie Anne

P.S.  If you'd like to print a copy of the pattern without the ads and wonky formatting, you can purchase it from my Etsy Shop, The Crooked Yarn.  It's included with another of my favorite dishcloth patterns in the listing called 2 Easy Dishcloth Patterns.

February 4, 2019

Simple 7" Granny Square - Free Crochet Pattern

Redneck showing off the granny squares
assembled into an afghan
Granny squares can be joined together to make so many things - afghans and baby blankets, shawls and wraps, even scarves and purses.  This easy pattern is similar to the traditional granny but with a slight variation of rounds of single crochet and double crochet in place of some of the cluster rounds.  There are no fancy stitches in this granny square, so even a beginner who knows how to crochet in the round should be able to master it with no difficulty.

Abbreviations:

Ch = chain
SC = single crochet
DC = double crochet

Materials needed:

Crochet hook size I
Three colors of worsted weight yarn (listed as Colors A, B, and C)

Simple 7" Granny Square Pattern

Round 1:  With Color A, ch 4 (becomes first DC), 2 DC in 4th ch from hook (1st ch), ch 1, 3 DC in same space three times, ending with ch 1, join with slip stitch to top of ch 4.   12 DCs in round.  Bind off.

Round 2:  Attach Color B in any ch 1 space.  Ch 3 (becomes first DC), 2 DC in same space, ch 2, 2 DC in same space (makes first corner) * (3 DC, ch 2, 3 DC) in next ch 1 space.  Repeat from * twice more, join with slip stitch to top of ch 3 (first DC).  Result:   Four corners made. Bind off.

Round 3:  Attach Color A in any ch 2 corner space.  Ch 3 (becomes first DC), 1 DC in same space, *skip 1, DC in next 4 stitches, skip 1, (2 DC, ch 1, 2 DC) in corner.  Repeat from * 2 more times, end with skip 1, 2 DC in corner, ch 1, and join with slip stitch to top of ch 3 (first DC).  Result:  4 DCs on each side with two clusters of 2 DC in each corner.  Bind off.

Round 4:  Attach Color C in any corner.  Ch 1 (becomes first SC), SC in same space.  * SC in next 7 stitches, (2 SC, ch 1, 2 SC) in corner.  Repeat from * 3 more times, ending 2 SC in first corner, ch 2 and join with slip stitch to top of first ch (first SC).  Result:  7 SCs on each side with two clusters of 2 SC in each corner. Do not bind off.

Round 5:  Continuing with Color C, ch 3 (becomes first DC), 1 DC in same space.  * DC next 10 stitches, (2 DC, ch 1, 2 DC) in corner.  Repeat from * 3 times, end with (2 DC, ch 1) in first corner and join with slip stitch to top of ch 3.  Result:  10 DC on each side with two 2 DC clusters in each corner. Bind off.

Round 6:  Attach Color A to any corner.  Ch 3 (becomes first DC), 2 DC in same space.  * Skip 2 stitches, 3 DC in next stitch three times, skip 2, (3 DC, ch 1, 3 DC) in corner.  Repeat from * 3 times, ch 1 in first corner and join to top of ch 3 Result:  Four clusters of 3 DC on each side, with two 2 DC clusters in each corner.  Bind off.

To make a full 7" square, finish with SC border using Color B, with (2 SC, ch 1, 2 SC) in each corner.  Bind off, weave in ends.


Here's a clean copy of the Simple 7" Granny Square for you to print without the advertising and extraneous info that appears on the blog.  And don't forget to check out the rest of my free crochet patterns.

Crochet as many of these granny squares as you'd like for personal use or for sale, but please don't sell the pattern.  If sharing with friends, please give them the link to this post instead of printing multiple copies of the pattern.  Please respect my efforts to provide this to you for free ...  thanks!

Enjoy!

~ Marie Anne

February 3, 2019

Easy Back and Forth Dishcloth - Free Crochet Pattern

Back and Forth Dishcloths in Seafoam Green
© Marie Anne St. Jean
(This easy crochet dishcloth pattern was previously published on Associated Content/Yahoo and later on Examiner  After both sites closed down, I listed it on Craftsy and of course now they've taken down most patterns there too, so I give up, and just going to post here again to my blog).

Dishcloths are fun to crochet because they work up very quickly and are a useful item that most anyone would be happy to receive as a gift.  My favorites are the simple ones that are worked in a fairly close stitch that doesn't get all stretched out when wet - a dishcloth doesn't need to be elaborate, it just needs to hold up to scrubbing!

I've probably crocheted more dishcloths from this pattern than any other over the years.  I call it the "Back and Forth Dishcloth" because you work one stitch in the back loop only, and the next one in the front loop only.  It's super simple, but alternating front and back loops gives it just the slightest hint of texture with just the single crochet stitch.  Even a beginner can learn to make this dishcloth on the day they first pick up a crochet hook.

Directions for Back and Forth Dishcloth

Materials Needed

Size H crochet hook
Any kitchen cotton yarn

Abbreviations

Ch = chain
SC = single crochet
SS = slip stitch
BLO = back loop only
FLO = front loop only

With size H (5.0 mm) crochet hook, ch 31

Row 1:  SC in third ch from hook, and each ch across.  Ch 1, turn

Row 2:  Skip first stitch, SC in BLO of next stitch, SC in FLO of next stitch, and continue across, alternating BLO and FLO, finishing with a regular sc through both loops of turning ch.

Repeat row 2 until your dishcloth is square (the number of rows might vary depending on how tightly you crochet).

Finishing:

After completing the last row, do not make a turning ch, but turn the dishcloth and SS through both loops of each stitch in top row and around the remaining three sides, working 2 SS in each corner.  SS to join to first SS in top.  Cut yarn leaving a small tail, weave in ends.

If you'd like to print a copy of this pattern without the ads and wonky formatting, visit my Etsy Shop, The Crooked Yarn, and look for a listing titled 2 Easy Crochet Dishcloth Patterns.  And don't forget to check out the rest of my free crochet patterns!

Crochet as many dishcloths as you'd like for personal use or for sale, but please don't sell the pattern.  If sharing with friends, please give them the link to this post instead of printing multiple copies of the pattern.  Please respect my efforts to provide this to you for free ...  thanks!

Enjoy!

~ Marie Anne


February 2, 2019

Touchdown Scarf to Crochet in Team Colors

Touchdown Scarf from RedHeart.com
Looking for something quick and easy to crochet this weekend? Check out this Touchdown Scarf pattern from Red Heart!  The Patriots and Rams will be meeting up in Atlanta on February 3 for Super Bowl LIII, and if you're reading this today, you've still got time to whip out one (or more!) of theses scarves to support your favorite team.

I'm a Green Bay Packer fan, but I grew up in NH so the New England Patriots are a close second for me.  Since red, white, and blue are much nicer color choices for accessories, I think I'd go that route instead of Packer green and gold, but I think this scarf would look nice in any colors you might like to throw together.

Who are you rooting for?

~ Marie Anne


LIckety-Split Knit Dishcloth - Free Pattern

The Lickety Split knit dishcloth pattern was originally available for free on Associated Content/Yahoo and when that folded, I published it on Examiner.  When they closed down also, I listed it for a few pennies on Craftsy, but now that is changing too, so I'm giving up and posting it here again for free on my blog.

This knit dishcloth pattern doesn't require a lot of counting and the pattern repeat is easy to follow, so anyone who knows how to cast on, work a simple knit and purl stitch, and bind off should be able to work this up lickety-split.

Finished size is approximately 8 1/2" square

Materials needed:

Size 6 knitting needles
Large yarn needle to weave in ends
Kitchen cotton yarn (Requires approx. 1.2 oz per cloth.  You should be able to get two cloths from a 2.5 oz ball of yarn)

Tip #1:  I've written the pattern to slip stitch the first stitch and purl the last stitch of every row.  Doing this keeps the finished piece from curling, and gives it a nice, straight edge.  If you'd rather not do that, simply knit the first and last stitches in each row.

Tip #2:  To make it easier to follow and know which row you're working on, I've included a cheat sheet of numbered rows at the end of the pattern so that you can cross off each row you've worked and never lose your place.  If you slip the pattern into a plastic document protector sleeve and use a grease pencil to mark off each row as you've finished it, you can re-use the same sheet over and again.  No scraps of paper and stitch counters needed!

Lickety Split Knit Dishcloth Pattern

With size 6 knitting needles, cast on 42

Rows 1-5, slip stitch first stitch, (SS), knit remainder of row to last stitch, P1

Pattern Rows:

Row 6: SS, K3 (P4, K2, P4) to last 4 sts, K3, P1

Row 7:  SS, knit remainder of row to last stitch, P1

Row 8:  SS, K3 (P4, K2, P4) to last 4 sts, K3, P1

Row 9:  SS, knit remainder of row to last stitch, P1

Row 10:  SS, K3, purl across to last 4 sts, K3, P1

Row 11:  SS, knit across to last stitch, P1

Row 12:  SS, K3, purl across to last 4 sts, K3, P1

Row 13:  SS, knit across to last stitch, P1

Rows 14-45:   Repeat pattern rows 6-13 four times

Row 46-48:  Repeat rows 6-8

Rows 49-53:   SS, knit remainder of row to last stitch, P1

Bind off, weave in ends.

This pattern may be used to make items to sell, but you may not sell the pattern itself.  If you'd like to share it with friends, please share the link to this blog post, and don't just copy or print the directions for them. While this is a simple pattern, it does take time to knit the cloths and translate to written directions, include the row guide that you can mark off, transfer to .pdf form so that you may read/print it easily without advertisements, take photographs, etc., and ultimately publish the pattern   I enjoy providing free, easy patterns for others, but please respect my efforts - thanks!


Close-up of Lickety Split Knit Dishcloth

Close up of folded Lickety Split Knit Dishcloth


Lickety-Split Knit Dishcloth Cheat Sheet 

Rows 1, 6, and 10 are the only rows you need to remember. All other rows are repeats of those three.

Row 1: SS, knit remainder of row to last stitch, P1

Row 6: SS, K3 (P4, K2, P4) to last 4 sts, K3, P1

Row 10: SS, K3, purl across to last 4 sts, K3, P1

Instead of trying to follow the longer written pattern earlier in this post, use the list below to follow the sequence of rows directly above this, and mark them off as you go along.

1       1 1       1 1


6       1 6       1 10 1      10 1


6       1 6       1 10 1       10 1


6       1 6       1 10 1       10 1


6       1 6       1 10 1       10 1


6       1 6       1 10 1       10 1


6       1 6            

1       1 1       1 1

P.S.  If you'd like a clean copy without advertising and wonky formatting, you can find it available in my Etsy shop, The Crooked Yarn.   And don't forget to check out the rest of my free knitting patterns.

Enjoy!

~ Marie Anne

October 27, 2016

Stash Buster Round Dishcloth Crochet Pattern

Do you hoard save small amounts of yarn in your craft closet, hoping for the perfect opportunity to use them all up someday?  Guilty!  I crochet a lot of dishcloths and always have small amounts of cotton yarn left over, not enough to make another cloth with, but too much that I don't want to throw it out.  I tuck it away in a bag somewhere, knowing that someday it'll have a purpose.

I decided the other day that 'someday' had come, and I was going to figure out a way to use those bits of scrap yarn or it would meet the trash can after all.  I was going to make scrappy dishcloths, starting with one color until it ran out, then just grab another, not really caring how ridiculous it might end up looking.  I make square dishcloths in a back and forth pattern instead of in the round, so yea, they would be crazy, but still useful.

I thought about granny square-type dishcloths, but they have too many holes for me.  I then whipped up a solid granny and that worked out better, but I still wasn't satisfied.  I then searched for round dishcloth patterns, but none of the ones I found seemed to be 'the one'.  Then I remembered a star-like baby blanket pattern that I'd made before, and decided to see what would happen if I crocheted just the first few rounds of that.  BINGO!

What I started with is called the Rainbow Ripple Baby Blanket  which is a 12-pointed star pattern.  It doesn't really turn into a pointed star shape until much later into the pattern, but the first few rows make it just a little less plain than a straight (circular?) round shape, with 12 gentle peaks rather than points.  Because it's worked in the round rather than back and forth like my other favorite dishcloth patterns, the first rounds require very little yarn, then gradually requires slightly more yarn for each round.  It's a simple pattern too, strictly DC throughout, so even a beginner should be able to  make it.

You can make your dishcloths all one color, have the center two rows one color and the remaining rounds another color, solid color with just the last border round in a contrasting color, every round a different color - whatever suits your fancy (or the size of your scrap stash).  You could even just keep attaching the new yarn whenever you run out and not just at the end of a pattern round ... there are no rules!


I made a few dishcloths working the pattern through round 6 and a couple of them through round 7, and I personally like the smaller one better.  It's just the right size for me and doesn't stretch out too much when wet.  Oh, and I used a size G crochet hook so that the holes would be just a little smaller too.

I'm so glad that I didn't give up on my quest, and now have a use for the scraps of cotton yarn I've saved.  Do you save your small bits of yarn, or trash it all before your stash overtakes your life?

~ Marie Anne

September 27, 2016

"Almost Lost" Knit Dishcloth Variation Results

I posted yesterday about the cool looking round knit dishcloth pattern I found, but didn't have the right size needles for.  The pattern calls for size 8 knitting needles, but I worked one up using size 5, since that's all I could find.  That first cloth was just a little tighter than I would have liked, but I knew that I wouldn't be happy with using the size 8 as I thought it would be too loose for my liking.

Well as it turns out, I looked at the needles again and what I used yesterday was actually a mismatched set - a size 4 and a size 5!  I found my size 6 needles and thought that would give me the tension that I was looking for but probably wouldn't be as big as I'd like, so I modified the pattern a little, adding two stitches and then another whole point, giving me 15 points instead of the 14 that the original pattern worked up to be.

The result was a knit dishcloth that measures just shy of 9" from point to point, where my smaller one was only 7" across.  Here's a side-by-side photo of them both on a dinner plate for size reference.  The larger one is curled up just a little because it followed the lip on the plate, but is fine on a flat surface.


Honestly, either size would work ok for me, so I think I'll either use my size 6 knitting needles, or splurge on a size 7 and go with the original pattern.

No matter what size needles are used, the "Almost Lost" pattern turns out a nice cloth that can be used as either washcloth or dishcloth.

~ Marie Anne


September 26, 2016

Newest Knit Dishcloth/Washcloth, Almost Lost

I was poking around on Pinterest last night and saw this neat knit dishcloth that looked easy, and thought I'd give it a try.  I normally don't like to knit as much as I do crochet, but I really like the feel of certain knitted dishcloths as they're more pliable than crochet, in my opinion.  I like the old standard diagonal cloth because I think it has more 'give' than a straight stitch, but this one, called "Almost Lost", is more of a circle, so the stitches aren't straight back and forth either, which is what piqued my interest. She actually labels it as a washcloth, but I will use mine as a dishcloth, and honestly, I find that the two are pretty much interchangeable.

The pattern calls for a size 8 knitting needle , which I didn't have (or couldn't find), so I started off with a size 9, and thought that was way too big and the stitches extremely loose.  The next closest size I could find a matching pair of was size 5, so I grabbed those next.  I actually did like the slightly tighter weave I got with the size 5 needles, but of course it came out much smaller than I anticipated.  I think I might move up to a size 6 needle and see if I can adapt the pattern to make it larger.

The pattern itself was pretty quick to work up, as long as I didn't lose my place.  It's the first time I ever knitted in this fashion, where you knit part of a row, then turn and knit back the way you just came, leaving the remainder of the stitches from the previous row on the needle without knitting them on that row.  It's not a hard concept to grasp at all, just have to make sure you finish the row before setting it down or you might get confused and think you're in the middle of a row rather than the beginning.  Sounds confusing, but it's explained pretty clearly in the pattern instructions.

So here's my first attempt at the "Almost Lost" knit washcloth.  I also think that variegated yarns look prettier in most knit  patterns than they do crochet, so that was a plus since I don't think I had a full ball of a solid cotton yarn in my stash.

My first attempt at the "Almost Lost" knit dishcloth

I'll definitely be making more of these knit dishcloths to list for sale in my Etsy shop.  They'll still take a little longer to knit than crochet, but I think this pattern will work up faster than the few other knitted dishcloth patterns I've tried, so I'm going to give it a go.

~ Marie Anne


July 16, 2016

Free Crochet Pattern Update

Times they are a changing ...

I used to list my simple crochet patterns for free, first on Associated Content/Yahoo Contributor Network, then when that site shut down a couple of years ago, I transferred them to Examiner.  Well that venue is gone now too, so I need a new plan to make my crochet patterns available to everyone.

I got paid a few pennies here and there when people clicked through to those sites to read my patterns, and while it wasn't a lot of money, I did rely on that small income each month.  I'll need to replace that income, so will be offering my patterns for sale on Craftsy and Etsy to make up the difference.

I wish I could still offer them for free, but the patterns will be grouped so that you will get more than one pattern, and they will be in a clean .pdf form with NO annoying ads, so I hope that will make it worth it to buyers.  Examiner was crazy with the popups and soft porn ads that drove people away, and trying to print a legible paper copy of a pattern was difficult with the ads everywhere.  The patterns in a .pdf file will be much easier for everyone to read without an advertisement smack in the middle of it, and buyers will be able to print a clean copy to save.

A couple of the really simple patterns that don't pair up with another will be offered free on this blog. I'll make a separate blog post about the pattern, and list it on the 'free patterns' page for easy access also.

I hope to get at least one set of patterns put together and listed today, so watch for another post with that announcement!

~ Marie Anne


August 25, 2014

Anything But Drab: New Links for Hat and Scarf


Anything But Drab Hat and Scarf
©Marie Anne St. Jean
I'm still in the process of moving my free crochet patterns from YCN to Examiner, and this morning I've moved the patterns for a matching hat and scarf that I call Anything But Drab.  If you had the old ones bookmarked, please take a minute to go to the new links and save those instead.  I've already made changes on Ravelry, and have updated my free crochet patterns page here on this blog as well.


They've been moved again, this time back to this blog!  I gave up on having them posted anywhere, only to have the sites go belly-up.  Links below have been corrected, and you can always find my patterns by clicking on the tab(s) just under the banner at the top of the page.


Anything But Drab Hat

Anything But Drab Scarf

These two are really easy, and worked a little differently than other hat and scarf patterns you might have tried.

The hat is worked in a rectangle and the two sides are stitched together and then gathered at the top, so if you have trouble working in the round, this might be your answer.

The scarf is worked lengthwise, which makes it work up a lot more quickly than when you have to turn the piece after just a few stitches in each row.  You could easily do both pieces in a weekend and they make a great gift or charity project.

~ Marie Anne


August 21, 2014

More of My Latest Afghan Crochet Project

I posted the other day that I was crocheting an afghan for my niece and shared a swatch that showed some of the colors that I intended to work with, and I've since started the actual afghan  and have completed a full round of all colors I'll be using.  I'm anxious to see how it plays out as I add more rounds of color.


My version of "Leaping Stripes"
©Marie Anne St. Jean


I really like how this pattern looks and while it's very easy to do, it's a little more time consuming having to poke around and hunt for the stitches two rows below.  By working over the previous row of stitches, it also makes it a thicker, more stiff blanket, so I think if I do this pattern again, I'll use a larger hook and see if that makes it a bit softer and less rigid.  If you want a crochet project that resembles a woven blanket more than a lacy throw, this pattern has that covered.

The link to the pattern can be found in my original post.

I chose to make this afghan with four rows of each of five colors, with two rows of Aran between them.  I've also done swatches with just two rows of all colors and I like that look too, and that would be a great way to use up scrap yarn from your stash.

I'm also working on a baby blanket in Petal Pink, and that one will be listed for sale on Etsy, since I don't know anyone who is expecting a baby girl.  I need to get to work on one for the baby boy that my great-niece is expecting this fall.

What's on your hook?

~ Marie Anne

August 3, 2014

Circle in the Square Granny Square - New Link

I moved another of my free patterns to Examiner this morning, so make sure to bookmark the new link for Circle in the Square Granny Square.


I love this granny square made with white and one other color to make it pop.  You can choose to make just one color, or use up your yarn scraps to make squares with lots of bright colors that will really make a statement for a baby blanket or afghan.  It's a 6" square as written, but I'm sure you could adapt it to make it larger if needed.

I'll be making a new post here on the blog whenever I move one of my patterns to the new site, but to make sure you don't miss any of my craft articles, look at the top of the right sidebar and click to subscribe to get a notification when a new article is published on Examiner.

~ Marie Anne